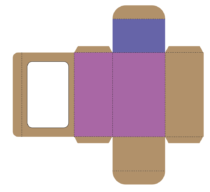
Step 1. Finding the box you want to make: go to our website and scroll down to find a website with many boxes already created. When you download it, it will download a folder where you can find different file formats.
Finding the box – Watch Video

Step 2. Creating a template: have a look at this video that will tell you how to use template maker to make your box to the right size.
Create a template – Watch Video

Step 3. Print your template and make the box. At this point we are working with regular paper since it is easier to fold. Once you have folded, you can go ahead and measure it and calculate what measurements you want for your final box.

Step 4. Understanding the difference between vectors and pixels and why we cannot use any software to make this box.
Vector vs Raster graphics – Watch Video

Step 5. Find the vector based software right for you, to open and modify your eps file. Have a look here for the different options.
Find the right vector base software for you – Watch Video

Step 6. Open your file in Affinity Designer
Open your file – Watch Video

Step 7. Changing the box size
Changing the size – Watch Video

Step 8. Decorate your box to bring in the information of your character design sheet.

Sending box to print – Watch Video
