
Criteria B, Developing ideas.
In this second criteria we will be developing ideas for your product, but before we jump into that there are some concepts about the 3D world that we need to address.
Session 1. We are going to start talking about the differences between the 2D and the 3D world, and we will take a trip outside to experiment what are those differences when we really have to draw the world around us. Can we draw the same object 2D and 3D? What are the differences? We will talk about depth and stereoscopical view. We will do some activities to demonstrate the relationship between the stereoscopical view and the perception of depth. We will introduce the concept of point of view.
Session 2. We will talk about different representation systems. We will discuss how drawing is nothing else that another language with its conventions and its norms. We will explore different representation systems created by Humanity and we will try to invent a new language. We will experiment how our thinking is contrived by what we have learned so far. Drawing from the difficulties to create a new language, we will introduce the systems created to represents the world around us. We will talk about the 3 axis system (x,y,z), called the cartesian system. From there we will review the concept of isometric drawing which is the most used system to represent three-dimensional objects two-dimensionally based on this cartesian system. We will finish with some exercises to understand the representation of object views (front, side, plan and back).
Session 3. We will combine the two first sessions to try to redraw the same objects we drew before using the isometric system but with a new method. We will introduce the concept of parallel perspective drawing and the vanishing point. We will talk about Reinassance painters Giotto, Fra Angelico and Brunelleschi and Piero de la Francesca. Piero de la Francesca was indeed the first to study light in painting. And following his teachings we will talk about light and shadows in our own drawings.
Session 4. And finally we will move into mathematics, since we need to remember that the computer uses mathematical algebra to construct everything using 1 and 0s. So we will need to talk about geometry and volumetrics in order to explain how all the 3D software out there operates. We will talk about triangulation and numerical models. In order to illustrate these concepts that sound so complicated, we will have a look at one of the first 3d animations ever created.
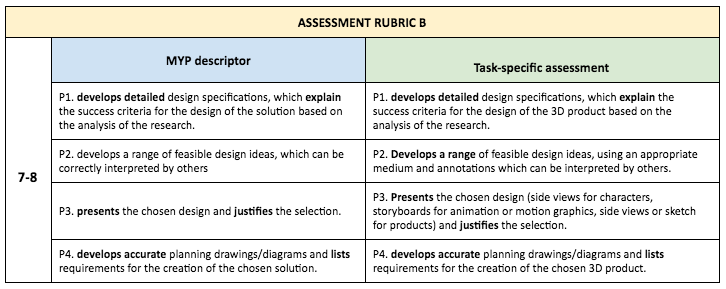
Part 1. Develop a design specification which clearly states the success criteria for the design of the solution.
You will need to go back to A4 (design brief) in order to create your design specifications including what you learned from your research.
A design specification is a list of requirements that your design ideas must meet plus a list of constraints that you have. It is the check list that you need to use when you start to make your design ideas. This will tell you:
- The target Audience- Who you are designing for?
- Objective – This is a description of what the solution will accomplish. It could indicate under what conditions it will work.
- Production –
- What it should look like (Size/colours/etc)
- What it should be made from.
- Tools needed to make the product.
- Time needed to complete the product.
- Usage – How it will be used.
I borrowed this from this website, where you can also see a nice example.
Part 2. Develop a range of feasible design ideas which can be correctly interpreted by others.
It is now time to do some brainstorming. We will divide the class on groups and you will have 15 minutes to brainstorm with your team in order to get suggestions on how to improve or develop your idea.
During the brainstorming session you can sketch on paper. Sketch as many solutions as you can think of without worrying too much about clarity. At this point it is just a matter of thinking.
This example can give you an idea. Indicate color on the most successful ones but keep on drawing.

Once you have many, you can choose the best 3 ones and present them in individual pages in order to ask for your classmate’s opinions.

Part 3. Present the chosen design and justify its selection.
Once you have a final design you need to do a proper design to indicate measurements, materials and views.
It is the time to practice your isometric drawing or perspective skills we have learned in this class.

But it is not the only way, architects sketch quite loose like you can see here.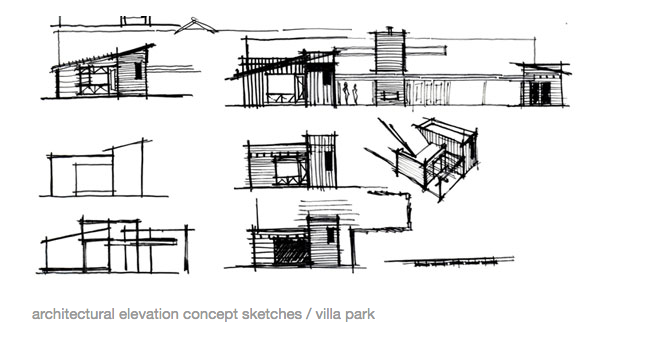
NOTE: If you are doing character design, animation or motion graphics, you can see examples on how to prepare your sketches here.
Part 4. Develop accurate and detailed planning drawings/diagrams and outline the requirements for the creation.
Once you have a final design you need to do a proper plan to indicate measurements, materials, sides and views.
Create a list of all the specifications that are not detailed in your final drawing.
Note that once you finish with this criteria you need to be completely sure about your final selection. From here you are moving into the creation criteria so you won’t be able to make any major changes. When working with a client it is really important to make sure they understand this, since changes during the creation area are going to alter the design process and may compromise the final solution.
Congratulations on finishing criteria B, you are ready to move into criteria C.